
How to Clean a Cold Plunge Without the Guesswork
A cold plunge should feel like a controlled reset: clear water, cold air, and a few deliberate minutes reserved for recovery. When the water looks dull, carries an odor, or leaves residue along the waterline, that ritual loses its clarity. Knowing how to clean cold plunge equipment correctly protects both the experience and the hardware behind it.
Cleaning is not about making a plunge look presentable once in a while. It is water management, surface care, and consistent inspection. A well-maintained unit requires less effort over time, supports cleaner water between changes, and gives you more confidence in a daily recovery practice.
Start With Your Plunge's Water System
Before adding any cleaner or draining the tub, understand how your cold plunge is designed to circulate, filter, and sanitize water. A basic insulated tub without circulation has very different maintenance needs than a temperature-controlled unit with a pump, filter, ozone, UV, or built-in sanitation system.
Your owner's manual takes priority over general guidance. Manufacturers may specify approved water treatments, filter types, drainage procedures, and cleaners that are safe for acrylic, stainless steel, inflatable materials, or composite finishes. This matters because the wrong chemical can cloud a surface, corrode components, degrade seals, or leave behind an irritant residue.
The principle is simple: use the least aggressive method that achieves a clean result. Avoid household degreasers, abrasive powders, undiluted bleach, and strongly fragranced cleaners unless your manufacturer specifically approves them. Premium equipment performs best when care is equally intentional.
How to Clean a Cold Plunge Step by Step
The most thorough clean happens when you drain the water. For many home users, that means a full cleaning every few weeks, though the right schedule depends on bather load, whether users rinse beforehand, filtration quality, sanitation method, and indoor versus outdoor placement.
1. Turn off the system and drain completely
Power down the chiller, pump, and any connected sanitation system according to the manufacturer's instructions. Then drain the plunge through its designated drain valve or pump. Never allow a pump or chiller to run without water if the system is not designed for it.
As the water level drops, inspect it. Fine debris, cloudiness, oils at the waterline, or sediment on the floor can tell you whether your routine needs adjustment. If the water becomes cloudy quickly after each refill, the issue may be filter maintenance, inconsistent sanitation, or too many contaminants entering the tub, not the tub itself.
2. Remove debris before wiping surfaces
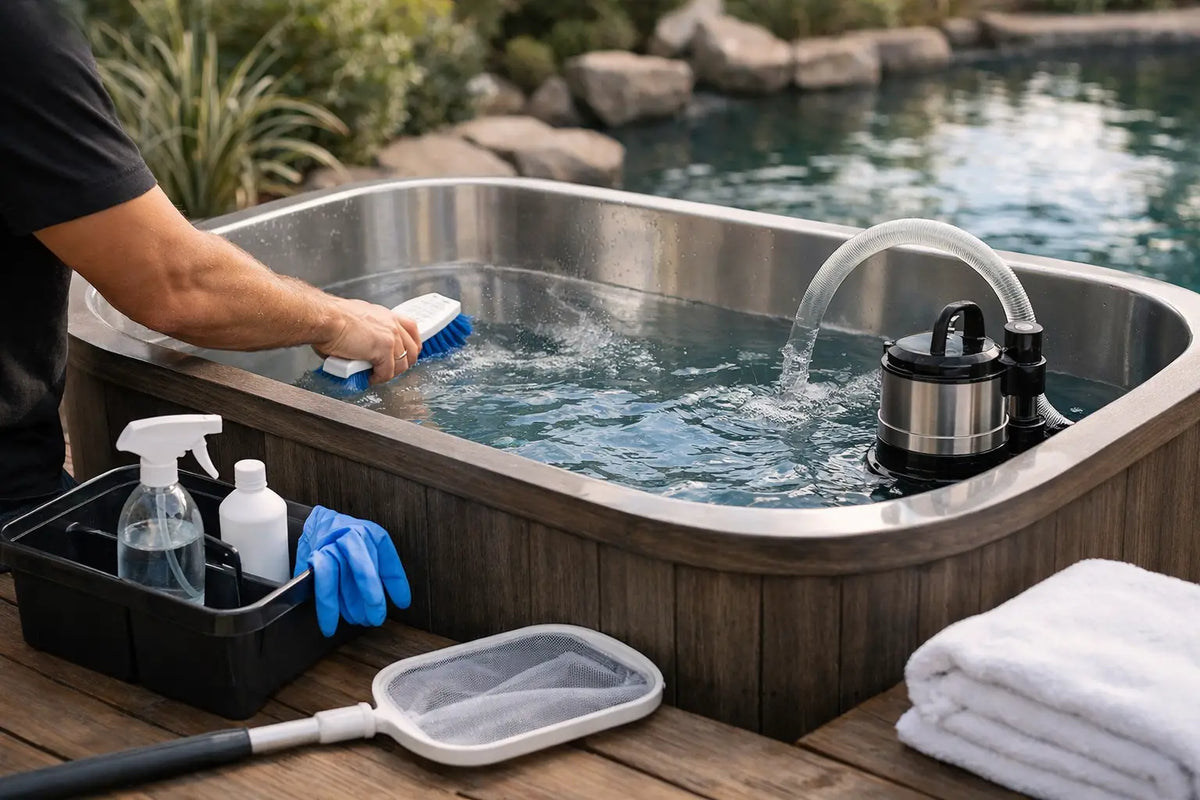
Use a soft cloth or nonabrasive sponge to lift visible debris from the empty basin. Pay close attention to corners, steps, jets, drain covers, and the waterline. Body oils, skincare products, sweat, and airborne dust tend to collect here first.
For routine surface cleaning, use a manufacturer-approved cold plunge cleaner or a mild, nonabrasive cleaner diluted as directed. Work in small sections. The goal is to remove film without scratching the finish or leaving a chemical layer behind.
3. Clean the waterline, lid, and exterior
The waterline deserves extra attention because it is where oils and residue settle. Wipe it carefully, then clean the underside of the lid or cover. That enclosed surface can collect condensation, dust, and residue even when the plunge water appears clear.
Clean the exterior with a soft microfiber cloth and the material-appropriate cleaner. Avoid spraying liquid directly near control panels, electrical connections, vents, or chiller components. A refined recovery space depends on details, but water and electronics should remain separate.
4. Rinse until no cleaner remains
Rinse the basin thoroughly with clean water. This is one of the most overlooked steps. Leftover cleaner can foam after a refill, affect water balance, and create unnecessary skin irritation.
Use clean towels to dry reachable surfaces, or leave the lid open briefly to allow the basin to air dry. A dry, empty plunge is also the best time to check for worn gaskets, loose fittings, discoloration, or signs of mineral buildup.
5. Service the filter and refill with fresh water
If your system uses a removable filter, inspect it each time you change water. Rinse reusable filters as directed and replace disposable filters on schedule. A filter that looks only slightly discolored can still restrict circulation and reduce the effectiveness of the entire water-care system.
Refill the plunge to the recommended level, then restart circulation. Add any approved sanitizer or water treatment only after the tub is full and the system is operating as instructed. Test water chemistry if your setup requires it, and allow the water to reach your preferred temperature before use.
Build a Maintenance Rhythm That Matches Use
A clean cold plunge is easier to maintain than to rescue. Rather than waiting for visible problems, organize care around a repeatable rhythm.
After each session, replace the lid securely and remove leaves, hair, or debris before they settle. If multiple people use the plunge, ask everyone to rinse off first. This one habit reduces the sunscreen, lotion, sweat, and body oil that make water deteriorate faster.
Once or twice per week, wipe the waterline, check the water's clarity and odor, and inspect the filter. If your system uses sanitizer, test and adjust it according to the approved range. Clean water should look clear and smell neutral. A sharp chemical smell does not signal cleanliness. It can indicate an imbalance or buildup that needs attention.
Every two to four weeks, plan a drain-and-clean cycle for a typical residential plunge. You may need to do it more often if the plunge is outdoors, used daily by several people, or not equipped with dependable filtration and sanitation. A lightly used, well-filtered indoor unit may go longer, but only if water testing and manufacturer guidance support it.
Keep Contaminants Out Before They Reach the Water
The most effective cleaning strategy begins before you step in. A quick shower, especially after training, removes sweat, deodorant, makeup, body lotion, and hair products that would otherwise enter the system. Use dedicated clean swimwear if you prefer clothing in the plunge, and avoid wearing freshly washed garments that may release detergent residue.
Keep the cover on whenever the plunge is not in use. For outdoor installations, this protects against pollen, insects, leaves, rainwater, and direct sun exposure. It also helps the chiller maintain temperature more efficiently. For indoor installations, a cover still matters: it reduces dust and limits evaporation in a space where humidity should be managed deliberately.
If you use oils, bath salts, magnesium flakes, or other additives in your wellness routine, keep them out of the cold plunge unless the manufacturer explicitly approves them. These additions may sound restorative, but they can compromise filters, pumps, and water balance.
When a Simple Clean Is Not Enough
Drain and address the problem promptly if water becomes persistently cloudy, develops a musty or sour odor, feels slimy on surfaces, or produces unusual foam. Do not try to mask these signs by adding more chemicals. Water that is not responding to normal treatment needs a full reset, including basin cleaning and filter inspection.
Scale or mineral deposits may require a manufacturer-approved descaling approach, particularly in areas with hard water. This is a case where product-specific instructions matter. The wrong descaler can damage finishes and internal components, while ignoring buildup can gradually restrict flow and reduce performance.
If circulation weakens, temperature control becomes inconsistent, or a leak appears near fittings or equipment, stop troubleshooting with cleaners and contact qualified support. Cold-plunge maintenance should preserve performance, not become an improvised repair project.
A Cleaner Plunge Supports a Better Practice
Cold exposure asks for presence. The water should be the challenge, not uncertainty about what is in it. A short weekly check, a thoughtful drain-and-clean schedule, and clean pre-plunge habits keep the process quiet, efficient, and dependable.
Treat maintenance as part of the ritual. When the lid lifts to clear water and a stable temperature, it is easier to return to the practice with the focus it deserves.